OmAreaLight: Difference between revisions
mNo edit summary |
mNo edit summary |
||
| Line 1: | Line 1: | ||
[[Image:BuyNow.jpg|right|http://www.daz3d.com/omarealight-light-shader-for-daz-studio]] | [[Image:BuyNow.jpg|right|link=http://www.daz3d.com/omarealight-light-shader-for-daz-studio]] | ||
[[Image:OmAreaLight_pp_banner.jpg]] | [[Image:OmAreaLight_pp_banner.jpg]] | ||
Latest revision as of 22:25, 3 January 2014
The omAreaLight is a light shader for DAZ Studio allowing you to simulate panel lights, soft boxes, other rectangular light sources such as TVs, florescent lights, etc. The Area Light source provides for realistic soft shadows as well as diffuse wrapped lighting.
User Guide
Bellow is a description of the various controls of the omAreaLight.
Shadows
The look of your shadows will depend greatly on the size/shape of your light source (see the Area section). In addition to Shadow softness, omAreaLight also allows you to control shadow intensity (opacity) and color.
| Image | Parameters |
|---|---|
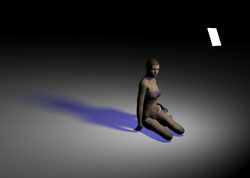 |
Shadow Color=Blue Shadow Intensity=50% |
Light Basics
The Double Sided parameter can be used to make the omAreaLight cast light in all directions, similar to an omnidirectional or point light.
| Image | Parameters |
|---|---|
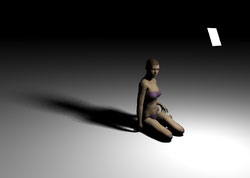 |
Double Sided=On |
Area
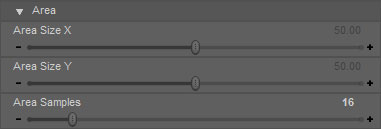
The size/shape of the omAreaLight is a critical part of getting the look you want. A larger light source will provide softer light and shadow whereas a small light will give you sharper shadows and more direct lighting.
Using the Area Size X and Area Size Y Parameters, one can also create rectangle shapes to achieve effects as diverse as tube and panel lights.
| Image | Parameters |
|---|---|
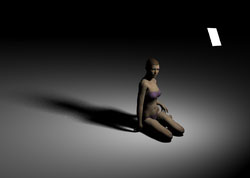 |
Area Size X=20 Area Size Y=20 |
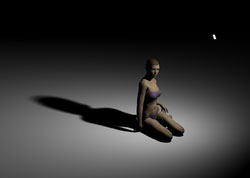 |
Area Size X=5 Area Size Y=5 |
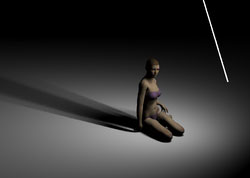 |
Area Size X=3 Area Size Y=100 |
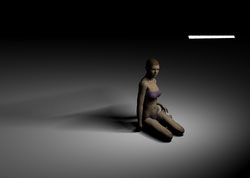 |
Area Size X=100 Area Size Y=3 |
Area Samples
The Area Samples parameter is the speed vs quality control for the omAreaLight; the higher the value, the better quality shadows and shading you will get at the cost of render speed.
![]() When using large light sources (high Area Size values), you may need to increase your Area Samples in order to avoid noise artifacts.
When using large light sources (high Area Size values), you may need to increase your Area Samples in order to avoid noise artifacts.
Falloff
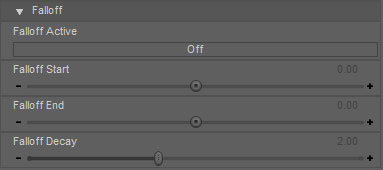
The Falloff controls for omAreaLight operate the same way as will the UberPoint light.
| Image | Parameters |
|---|---|
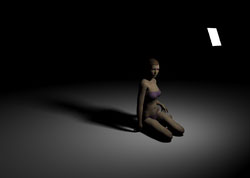 |
Falloff Start=0 Fallof End=500 Falloff Decay=1 |
 |
Falloff Start=0 Fallof End=500 Falloff Decay=2 |
The Light Source
When you load omAreaLight into a Scene you will see that the light has a child object called omAreaLight Source 1. This is geometry that represents the visible/renderable light source of the area light. If you do not want to see the light source plane in the render, select omAreaLight Source 1 and hide it (Toggle Visible to off).
Render Times
The omAreaLight calculates multiple samples (Area Samples) on the planar surface of the light in order to simulate the Area Light source. This means, the more samples, the longer the render times (and higher quality). Since the shadows are ray traced, scenes that using lots of transparency (ie trans-mapped hairstyles) or containing lots of geometry can result in very long render times.
The product page images I rendered were rendered at 650x500 on a Pentium Core Duo (2.2Ghz) Laptop with 3Gb RAM. Images rendered in the 5min-40min range.
Caveats
- The area light provides accurate diffuse and shadows; as the lighting becomes more diffuse, the specular will also become softer. It may be difficult to create a perfectly sharp, square shaped highlight.
- omAreaLight uses ray tracing in order to calculate its realistic shadows; this can lead to long render times especially when using large amounts of geometry and transparency.
Tips and Tricks
- Do test renders with a low Area Samples value like 4 in order to block in light placement and size; bump up to a value like 16 for final renders.
- When using large light sources (high Area Size values), you may need to increase your Area Samples in order to avoid noise artifacts.
- As you increase the size of the area light, you may need to also increase the intensity.


