UberEnvironment2
UberEnvironment2 provides the next generation of HDR/IBL/Environment lighting in DAZStudio.
User Guide
Whats new in UberEnvironment2
- Rotating the light will now affect light direction.
- Shadows can now be directional based on EnvironmentMap.
- Added ability to use indirect or bounced light with HDRI. This provides easy access to realistic and subtle lighting effects as energy is transmitted and reflected through the scene.
- GI mode for adding bounce to a scene without IBL.
- Added bias control which can help to prevent possible artifacts from finely detailed geometry/displacement.
Visualization
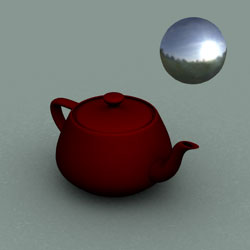
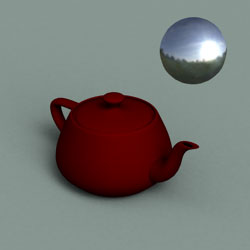
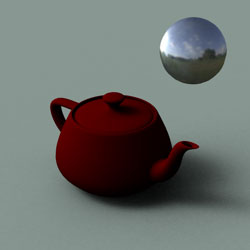
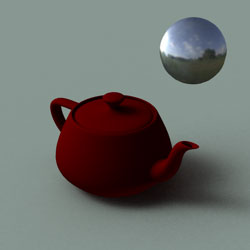
UberEnvironment2 will load sphere object in your scene. The sphere is there to help you visualize the image based lighting; if you have a hot spot in your HDRI, you can rotate the light to change the 'key' direction. This is especially useful when using a directional shadow mode.
![]() It is sometimes more helpful to scale down the EnvironmentSphere so it can be seen in camera.
It is sometimes more helpful to scale down the EnvironmentSphere so it can be seen in camera.
Environment Mode
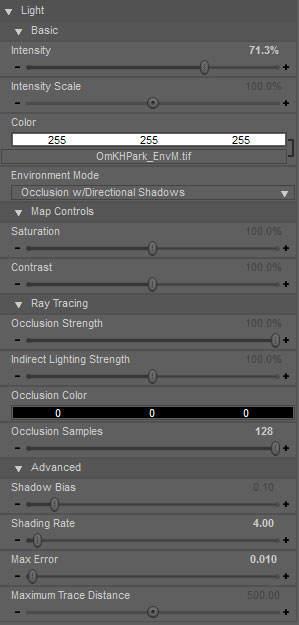
One of the most critical settings for UberEnvironment2 is the Environment Mode
![]() Direction Shadows can only be achieved by using an EnvironmentMap. If the Light Color is not mapped, the direction of the light source is uniform and so the shadows will be as well. Directional Shadows are achieved by examining the HDR and sampling the map where the map has the highest values.
Direction Shadows can only be achieved by using an EnvironmentMap. If the Light Color is not mapped, the direction of the light source is uniform and so the shadows will be as well. Directional Shadows are achieved by examining the HDR and sampling the map where the map has the highest values.
Ambient (No Ray Tracing)
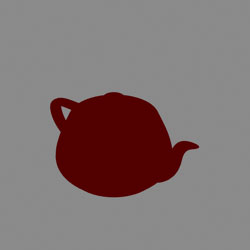
The Ambient mode will apply color without any raytraced shadows. This mode can be used with an environment map and at the least can used as more desirable alternative to using Ambient on the surfaces.
![]() Use this mode to quickly position HDR before turning on occlusion and taking the hit for raytracing.
Use this mode to quickly position HDR before turning on occlusion and taking the hit for raytracing.
| Ambient (No Ray Tracing) | With EnvironmentMap |
|---|---|
 |

|
Occclusion
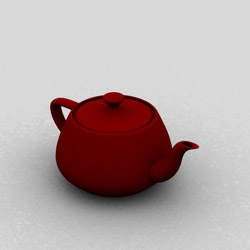
| Occlusion w/Soft Shadows (No EnvironmentMap) |
|---|
|
| Occlusion w/Soft Shadows | Occlusion w/Directional Shadows | Rotated Light |
|---|---|---|
 |
 |
|
Indirect Lighting
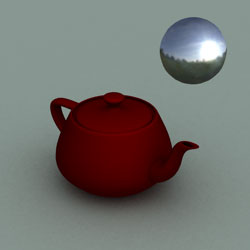
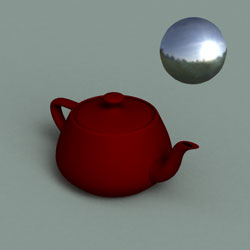
The Indirect Lighting mode gives you a similar look to using Occlusion with the addition of indirect lighting or bounce light.
| Indirect Lighting w/Soft Shadows | Indirect Lighting w/Directional Shadows | Rotated Light |
|---|---|---|
 |
 |
|
Bounce Light (GI)
The previous methods are meant to be used primarily with Image Based Lighting--that is the lighting is being driven primarily by an image. This last method is designed to be used to enhance traditional lighting scenes. When using this mode, spotlights, point lights, etc should be the main source of light.
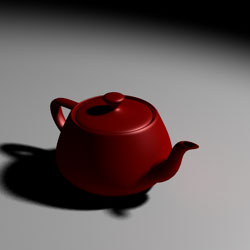 A single UberSpot is the primary source of light. The light reflected from the ground into the teapot is provided by UberEnvironment2
Tips and Tricks
- Under Render->Advanced, make sure Max Raytrace Depth is set to as low a value as possible; usually 1 or 2 will work. High values will dramatically increase render times.
- Raytraced effects get slower as the geometry increases in the scene. If there is geometry (props, characters) that are in your scene and not contributing to the final image, make it invisible or delete it.
- Use the quality control presets often. Always start with the lowest quality that will work to approximate the effect before bumping up the quality.
- It is often very useful to turn off all other lights in the scene until you have roughed in general light direction/intensity.
- Only ever use one UberEnvironment in a scene.
- When using Environment Maps, use the Ambient mode initially. When you are satisfied with your light placement/direction after doing some test renders, turn raytracing back on for the full effect.
- Transparent objects will slow down UE2 (ie hair). You may wand to use UberSurface and turn Raytrace Off so that the hair is not seen be UberEnvironment2 in order to speed up your renders.
Related Links
- UberEnvironment
- UberSpot
- UberPoint
- UberAreaLight
FAQ
Is UberEnvironment2 compatible with RenderThrottle?
- Yes.
