UberSurface: Difference between revisions
No edit summary |
mNo edit summary |
||
| (4 intermediate revisions by 2 users not shown) | |||
| Line 1: | Line 1: | ||
== | == Product Description == | ||
[[ | UberSurface is an upgrade of the [[HumanSurface]] shader and has all of the same controls with the addition of layered anisotropic specular and diffuse roughness. | ||
http:// | '''New Features''' include: | ||
* Layered Anisotropic Specular. | |||
* Diffuse Roughness control | |||
* Subsurface can render when Diffuse is not active. | |||
* Improved handling of single-sided geometry (hair). | |||
* ''Fantom'' and ''Raytrace'' visibility controls. | |||
== User Guide == | |||
Please see the '''[[HumanSurface]]''' page which covers all controls that are not described here; UberSurface has all of the controls that [[HumanSurface]] does...and more. | |||
=== Anisotropic Specular === | |||
[[Image:UberSurface_doc_ani_controls.jpg]] | |||
Keep the following in mind when using '''Anisotropic Highlights''': | |||
* Toggle '''Anisotropic Active''' ''On'' in order to turn the specular from a traditional response to an anisotropic response. | |||
* The highlight shape is dependent on the '''uvs''' of the object; the object must have uvs in order for anisotropic highlights to work. | |||
* Use '''Anisotropic Direction''' to control whether the highlight will follow the ''U'' or ''V'' axis | |||
* [[Image:Alert.png]] The '''Specular Sharpness''' control does not currently have an effect on anisotropic highlights. | |||
{| border=1 | |||
! Anisotropic Direction = U | |||
|- | |||
| Glossiness 40% || Glossiness 65% || Glossiness 80% | |||
|- | |||
| [[Image:UberSurface_spec_aniu_gloss_40.jpg]] || [[Image:UberSurface_spec_aniu_gloss_65.jpg]] || [[Image:UberSurface_spec_aniu_gloss_80.jpg]] | |||
|} | |||
{| border=1 | |||
! Anisotropic Direction = V | |||
|- | |||
| Glossiness 40% || Glossiness 65% || Glossiness 80% | |||
|- | |||
| [[Image:UberSurface_spec_aniv_gloss_40.jpg]] || [[Image:UberSurface_spec_aniv_gloss_65.jpg]] || [[Image:UberSurface_spec_aniv_gloss_80.jpg]] | |||
|} | |||
{{#ev:youtube|HaPcERbn_wY}} | |||
=== Diffuse Roughness === | |||
[[Image:UberSurface_doc_diff_rough_control.jpg]] | |||
The '''Diffuse Roughness''' control allows you to tighten or broaden the diffuse response. For very diffuse surfaces like clay, you may want to lower the value slightly; for very specular surfaces like metal, you may want to increase the roughness. | |||
{| border=1 | |||
! Roughness 0.5 !! Roughness 0.8 !! '''Roughness 1.0''' !! Roughness 1.5 !! Roughness 3.0 | |||
|- | |||
| [[Image:UberSurface_diff_rough_05.jpg]] || [[Image:UberSurface_diff_rough_08.jpg]] || [[Image:UberSurface_diff.jpg]] || [[Image:UberSurface_diff_rough_15.jpg]] || [[Image:UberSurface_diff_rough_30.jpg]] | |||
|} | |||
=== Visibility Controls === | |||
[[Image:UberSurface_doc_fantom_control.jpg]] | |||
When '''Fantom''' is ''On'', the surface will not be visible to the camera, but will be visible to shadows and raytracing. This can be useful when an object is used to create a reflection or shadow, but we do not want to see the object. | |||
When '''Raytrace''' is ''Off'', the surface will not be seen by diffuse or specular rays. For example, this can useful if you do not want your hair to be seen by [[UberEnvironment]] to speed up your renders. | |||
== Tips and Tricks == | |||
*In order to emulate some of the hair properties as outlined in the Siggraph 03 paper [http://graphics.stanford.edu/papers/hair/ Light Scattering from Human Hair Fibers], I recommend the following: | |||
** Make the '''Primary Specular''' fairly tight and white in color | |||
** Make the '''Secondary Specular''' wider and use the diffuse maps to color the highlight. | |||
* If you do not want to futz with the setting but want great hair, check out [[UberHair]] | |||
Latest revision as of 21:01, 26 January 2010
Product Description
UberSurface is an upgrade of the HumanSurface shader and has all of the same controls with the addition of layered anisotropic specular and diffuse roughness.
New Features include:
- Layered Anisotropic Specular.
- Diffuse Roughness control
- Subsurface can render when Diffuse is not active.
- Improved handling of single-sided geometry (hair).
- Fantom and Raytrace visibility controls.
User Guide
Please see the HumanSurface page which covers all controls that are not described here; UberSurface has all of the controls that HumanSurface does...and more.
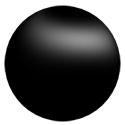
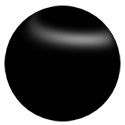
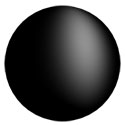
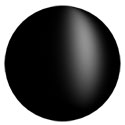
Anisotropic Specular
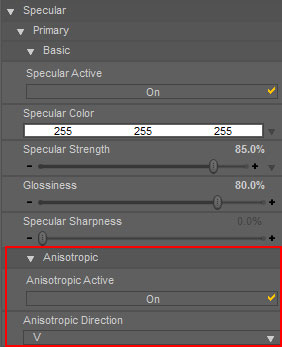
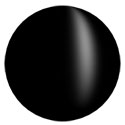
Keep the following in mind when using Anisotropic Highlights:
- Toggle Anisotropic Active On in order to turn the specular from a traditional response to an anisotropic response.
- The highlight shape is dependent on the uvs of the object; the object must have uvs in order for anisotropic highlights to work.
- Use Anisotropic Direction to control whether the highlight will follow the U or V axis
 The Specular Sharpness control does not currently have an effect on anisotropic highlights.
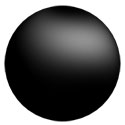
| Anisotropic Direction = U | ||
|---|---|---|
| Glossiness 40% | Glossiness 65% | Glossiness 80% |
 |
 |
|
| Anisotropic Direction = V | ||
|---|---|---|
| Glossiness 40% | Glossiness 65% | Glossiness 80% |
 |
 |
|
Diffuse Roughness
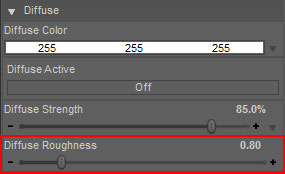
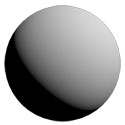
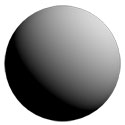
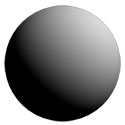
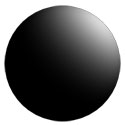
The Diffuse Roughness control allows you to tighten or broaden the diffuse response. For very diffuse surfaces like clay, you may want to lower the value slightly; for very specular surfaces like metal, you may want to increase the roughness.
| Roughness 0.5 | Roughness 0.8 | Roughness 1.0 | Roughness 1.5 | Roughness 3.0 |
|---|---|---|---|---|
 |
 |
 |
 |
|
Visibility Controls
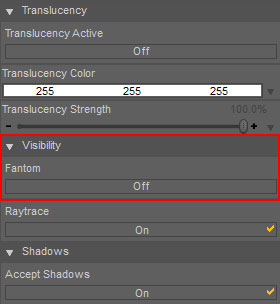
When Fantom is On, the surface will not be visible to the camera, but will be visible to shadows and raytracing. This can be useful when an object is used to create a reflection or shadow, but we do not want to see the object.
When Raytrace is Off, the surface will not be seen by diffuse or specular rays. For example, this can useful if you do not want your hair to be seen by UberEnvironment to speed up your renders.
Tips and Tricks
- In order to emulate some of the hair properties as outlined in the Siggraph 03 paper Light Scattering from Human Hair Fibers, I recommend the following:
- Make the Primary Specular fairly tight and white in color
- Make the Secondary Specular wider and use the diffuse maps to color the highlight.
- If you do not want to futz with the setting but want great hair, check out UberHair
